

Overview
Property - New Property
To create a new property, load the Organization / Org Edit screen, then 'Properties' at the top, locate the 'Add New' link to the right and click it.
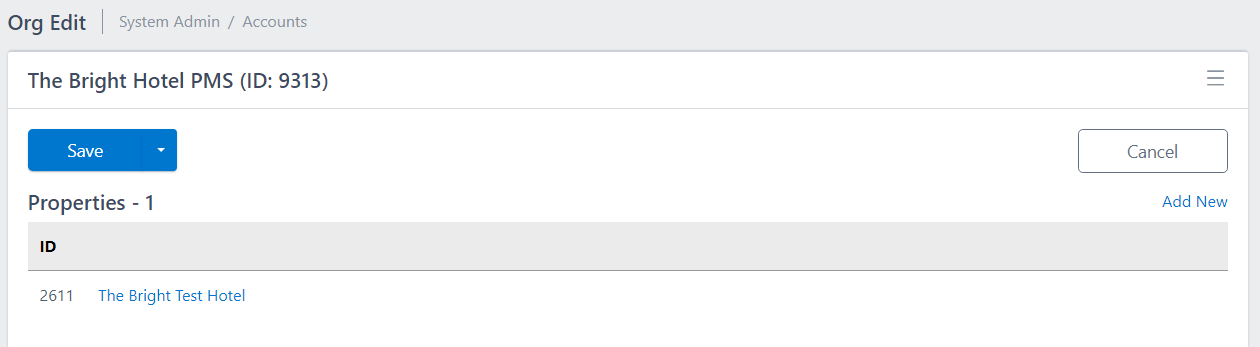
Enter all of the information you have available at the moment (Property Name and the Time Zone of the property are key to set correctly at this point) - then click 'Save & Continue'.
Property - New Room Types
Add New Property Room Types
Before the channels can be completely setup, you need to add the standard room types.
- Load the Property Edit screen.
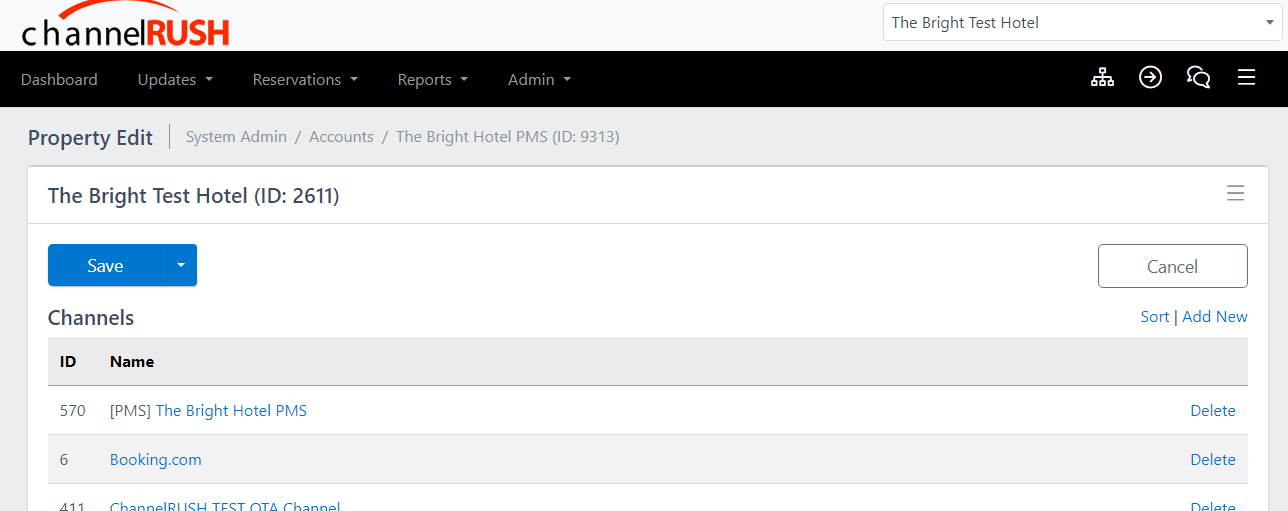
- Find 'Room Types', locate the 'Add New' link to the right and click it.
New Room Types Screen
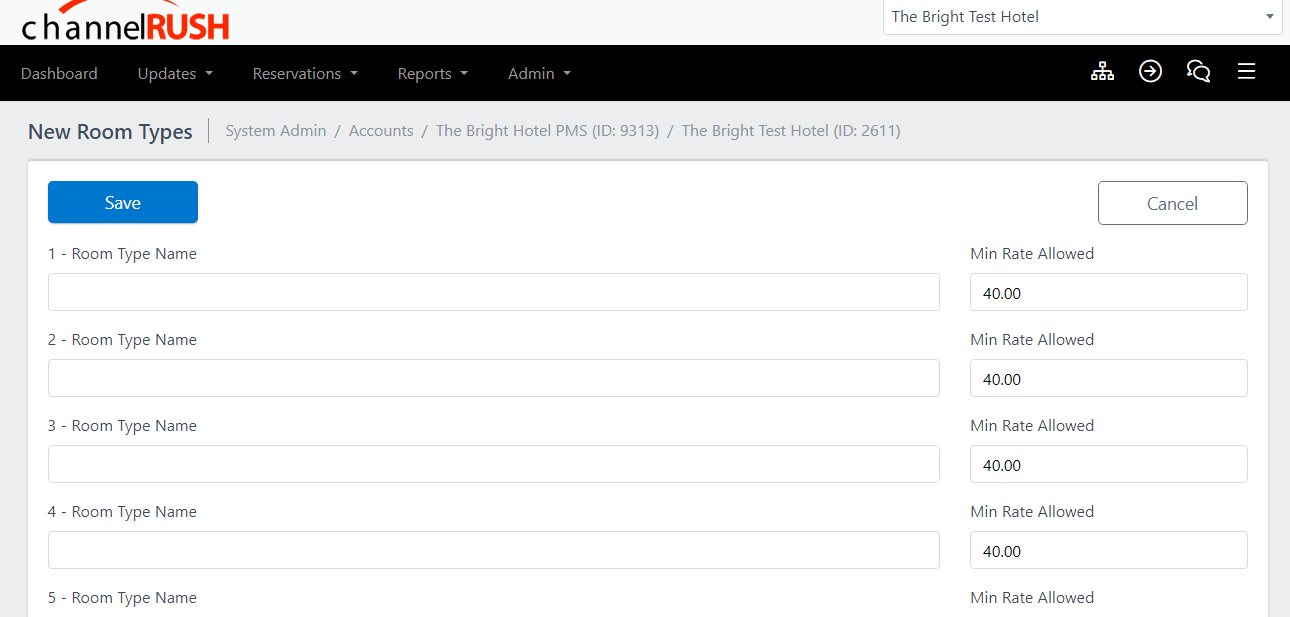
- Enter all of the room type names & click 'Save'.
Min Rate Allowed
This can usually be left to the default of $40 - but the idea is this is the lowest rate to be allowed through the system.
If someone enters $23 when they meant to enter $233, the system would block that rate update from being processed.
Reservation Delivery Emails
Add New Reservation Delivery Emails
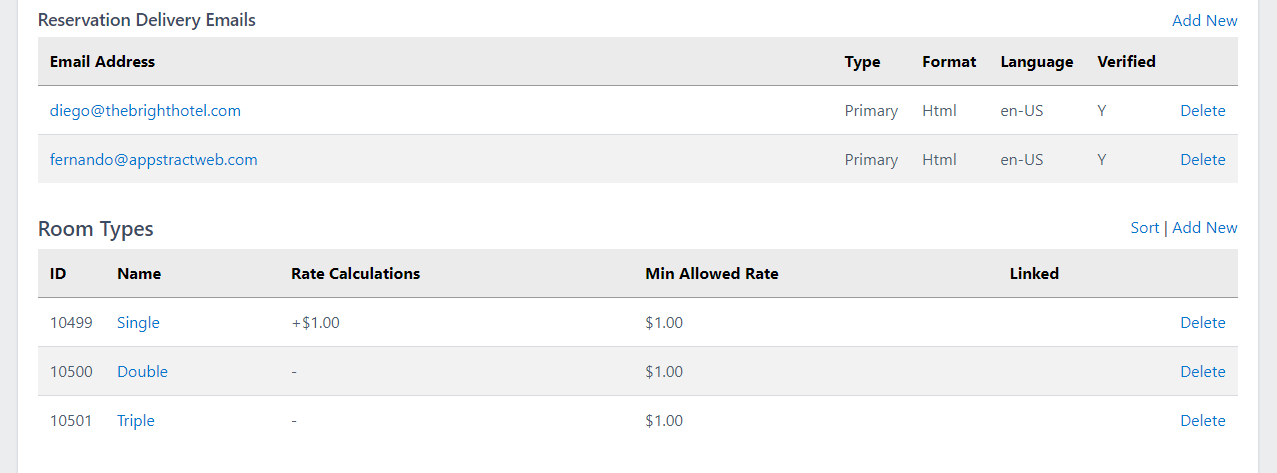
On the 'Property Edit' screen, scroll down to 'Reservation Delivery Emails'.
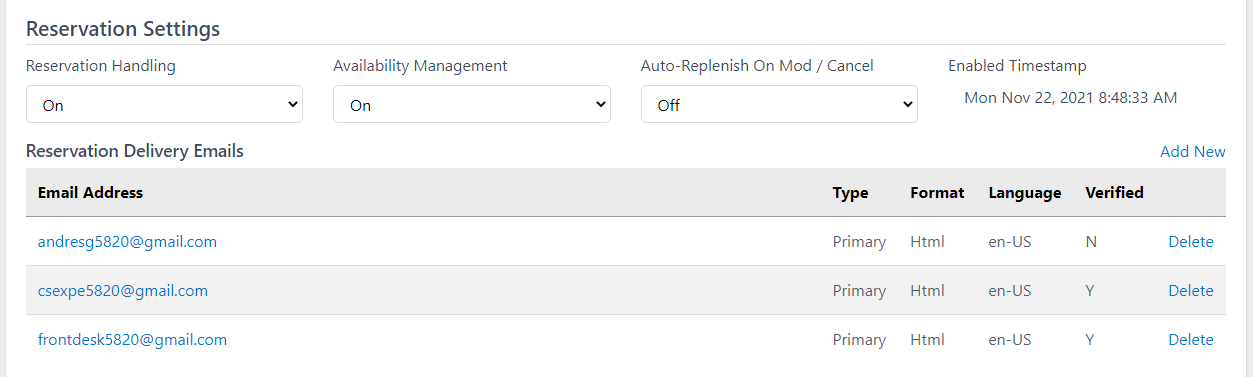
-
Click 'Add New'
-
Enter the email addresses that should receive reservation emails.
- 'Primary' means that the person will receive an email for each and every reservation.
- 'Backup' means the person will only receive an email when transport to the PMS fails.
-
Pick the language the reservation emails should arrive in, English / German / Spanish etc.
Reservation Delivery Emails - Delete
On the 'Property Edit' screen, scroll down to 'Reservation Delivery Emails'.
Click 'Delete' for the email in question.
Reservation Delivery Emails - Double Check
If the user is being deactivated because they are no longer with the company, you want to make sure their email is removed from 'Reservation Delivery Emails' as well.
The exception is - if a customer wants an email address to receive reservation emails, but not be able to login, then you would leave the email in the 'Reservation Delivery Emails'.
- Once the user has been deactivated (assuming you found the user) - go back to System Admin -> Accounts -> and enter the user's email address in the 'User Name, Email, or ID' field.
- If individual properties pull up, this means the user's email address is still listed under 'Reservation Delivery Emails' on the property edit screen.
- Load each property, and delete the email from 'Reservation Delivery Emails'.
Channel Manager
A property is adding a new channel to their channel manager.
This could be Booking.com (an OTA - Online Travel Agent) or it could be a PMS setup (which provides rates and availability to the OTAs for selling).
Channel - Adding A Channel
-
Load the property.
- You can either go to System Admin menu -> Accounts, and then search by the property name or property ID.
- You can search by property name using the property selector in the upper right hand corner.
-
Once you are on the 'Property Edit' (title in the upper left should say 'Property Edit') screen in System Admin, you will see the list of 'Channels' at the top. Click on 'Add New'.
-
Find the name of the channel in the 'Select Channel' drop down, and select it, then click 'Save'.
At this point the channel is now added or assigned to the property, and the channel itself needs to be set up.
Channel - Setting Up A Channel
-
Once you have added the channel, and are back on the 'Property Edit' screen, click on the name of the channel you wish to setup.
-
Once you do this, you will be on the 'Channel Settings' screen - were you can see and setup all of the settings for the property, room types, and rate plans.
-
The fist step is to set and save the Username, Password, and Channel Hotel ID and then save the settings.
- If you don't know the Username and Password, set the Username to 'u', and the Password to 'p'. Some channels don't require a specific username or password, so we set it to these characters just to fill the system requirement of a username and password being set.
- If you don't have the Channel Hotel ID, reach out for assistance, as this should have been provided for the setup.
-
Click on 'Mappings' at the top right of the page to pull the settings from the channel.
- If no 'Mappings' link exists, each room type and rate plan must be set up manually.
- Jump To: Steps - Setting Up A Channel - No Mappings Call
-
Switch back to the settings page, and press F5 to refresh/reload the page.
- When you load the mappings page, it saves the data, so refreshing the page loads the page with this data, and will show the 'Add Unmapped Room Types' link.
-
Click on 'Add Unmapped Room Types', click this to proceed.
-
Add Unmapped Room Types
-
Here you are matching up the channel's room types with the room types we have in ChannelRUSH.
-
Typically these match up - i.e. match the channel's 'Single' to our 'Single', but at times it doesn't match exactly, you will need to ask the customer which room types map to which room types.
-
If You Need To Ask the Customer - Room Type Summary
- On the Mappings tab, click on 'Room Type Summary', copy and paste the 'Settings Room Type Summary' to the customer, explain that you are not sure which room types match to which room types, and if they could match them up for us.
- Wait for their info before proceeding.
-
-
Add Unmapped Rate Plans
- Once the room types are mapped, you might be shown a screen to map unmapped rate plans.
- You might not though - if there are no rate plans to map you can skip this step as there will be no setup screen.
- Typically here you just press SAVE, we typically add all rate plans, even if they are not setup for direct updating.
- Note: If a hotel is using Standard Rate Plans (i.e. you see rate plans in the ChannelRUSH Rate Plan drop down), you might want to consider mapping the standard rate plans to the rate plans available. Ask for assistance at this point for clarification.
-
Setup Complete
- Once all of the room types and rate plans are setup, you should be back on the 'Channel Settings' screen and there is NO 'The channel is not setup' warning at the top.
- If there is, some additional settings are missing and need to be set. I would check at the property level - i.e. Expedia needs the Sell Rate or Net Rate set for the Rate Type (typically almost always Sell Rate).
-
Encountering Issues & Questions
- Keep notes during the setup if necessary, if you are not sure about something, write down your question to ask either internally or to ask the customer.
- At times there could be 5 room types from the channel and only 3 in ChannelRUSH - so do we add 2 room types or not map 2 of the 5 room types? Ask the customer for directions on this item.
NOTES
For Booking.com - once everything is completed, you must click the 'If the connection is ready or you have received this email in error, click on the following link: Click here.'
This notifies Booking.com the setup is completed, and to activate the connection.
Channel - Setting Up A Channel - No Mappings Call
When no 'Mappings' link exists for a channel, you must manually set up each room type and rate plan.
The customer or the channel should have provided you with all of the room type names and IDs, and any rate plan names and IDs required.
Next, copy and paste each into their respective field.
Channel - Delete
-
Load the property.
- You can either go to System Admin menu -> Accounts, and then search by the property name or property ID.
- You can search by property name using the property selector in the upper right hand corner.
-
Once you are on the 'Property Edit' (title in the upper left should say 'Property Edit') screen in System Admin, you will see the list of 'Channels' at the top.
-
Find the name of the channel you want to delete, then click the 'Delete' button to the right of it and confirm.
Room Type - Rate Plan - New
Sometimes an active / setup account just has new room types or rate plans added on the OTA, and they need to be mapped in ChannelRUSH for the property.
-
Load the settings page for the channel, then click on 'Mappings'. This kicks off a mappings pull, and refreshes our copy of the channel's mappings.
- If no 'Mappings' link exists, each room type and rate plan must be set up manually.
- Jump To: Steps - Setting Up A Channel - No Mappings Call
-
On the settings tab, press F5 to reload the page. You should see either an 'Add Unmapped Room Types', or 'Add Unmapped Rate Plans' link.
-
Click on the one, follow the prompts to add the new room types or rate plans.
-
Double check the settings page looks good - i.e. everything looks setup, no error or 'Not Setup' messages.
Room Type - Rate Plan - Delete Invalid
Sometimes the channel deletes room types or rate plans - for channels with an automated mapping call, once the mappings are refreshed (might be already done, but by clicking on 'Mappings' you can be sure they are current / refreshed) - invalid room types and rate plans will show up with 'INVALID MAPPING' next to them.
Delete Rate Plans
To delete rate plans, click on 'Delete Rate Plans' and select the ones that show up with 'INVALID MAPPING' next to them.
Delete Room Types
To delete or unmap a room type, you are not 'deleting' it like a rate plan, rather you are just removing/deleting the 'Channel Room Type Name' and the 'Channel Room Type ID' text.
Inventory Refresh
Push Rates, Availability, Inventory to one channel or all channels
From time to time a customer might ask for a 'refresh' or to 'push ARI' to a channel.
This means to re-send all of the data from the PMS to the specific channel (or to all channels).
- Click on 'System Admin'
- Click on 'Inventory Load'
- Click on 'PMS or Master -> Channels'
- Select the Organization and Property if not already selected, and press 'Continue'.
- From Image: Select the name of the PMS.
- To Image: Select the channel you want to push to, or all channels.
- Click 'Continue'.
- Click 'Save'.